Showing posts with label Chicken. Show all posts

Monday, June 25, 2012

Guilt-Free Meatball Sandwich

My husband and I are trying to eat healthy but we still want delicious food. So, although I've never done it before, I've decided to try to take some favorites and make them low calorie/low fat.
I was craving a meatball sandwich and figured that I could make it healthier without sacrificing taste. These turned out lovely and are around 400 calories per sandwich (including all optional ingredients listed). They were so filling that even my husband could only eat one.
You can make a ton of the meatballs and freeze them for up to six months!

What you'll need:

Boneless, skinless chicken breast or ground chicken. I used 6 lbs which made 60 two-ounce meatballs. (those are some big meatballs. If you want to make less, just figure 3 (two oz) meatballs per sandwich.)

2 eggs + 2 egg whites

3 slices multi grain bread - shredded, preferably low cal

3/4 - 1 cup breadcrumbs (use only if meatballs are too sticky when rolling)

fresh parsley - chopped

mushrooms, peppers, onions - sliced, fresh basil (all optional)

tbsp olive oil

pat of light margarine

1/4 cup parmesan (optional)

whole wheat rolls

low cal or thinly sliced cheese

light spaghetti sauce

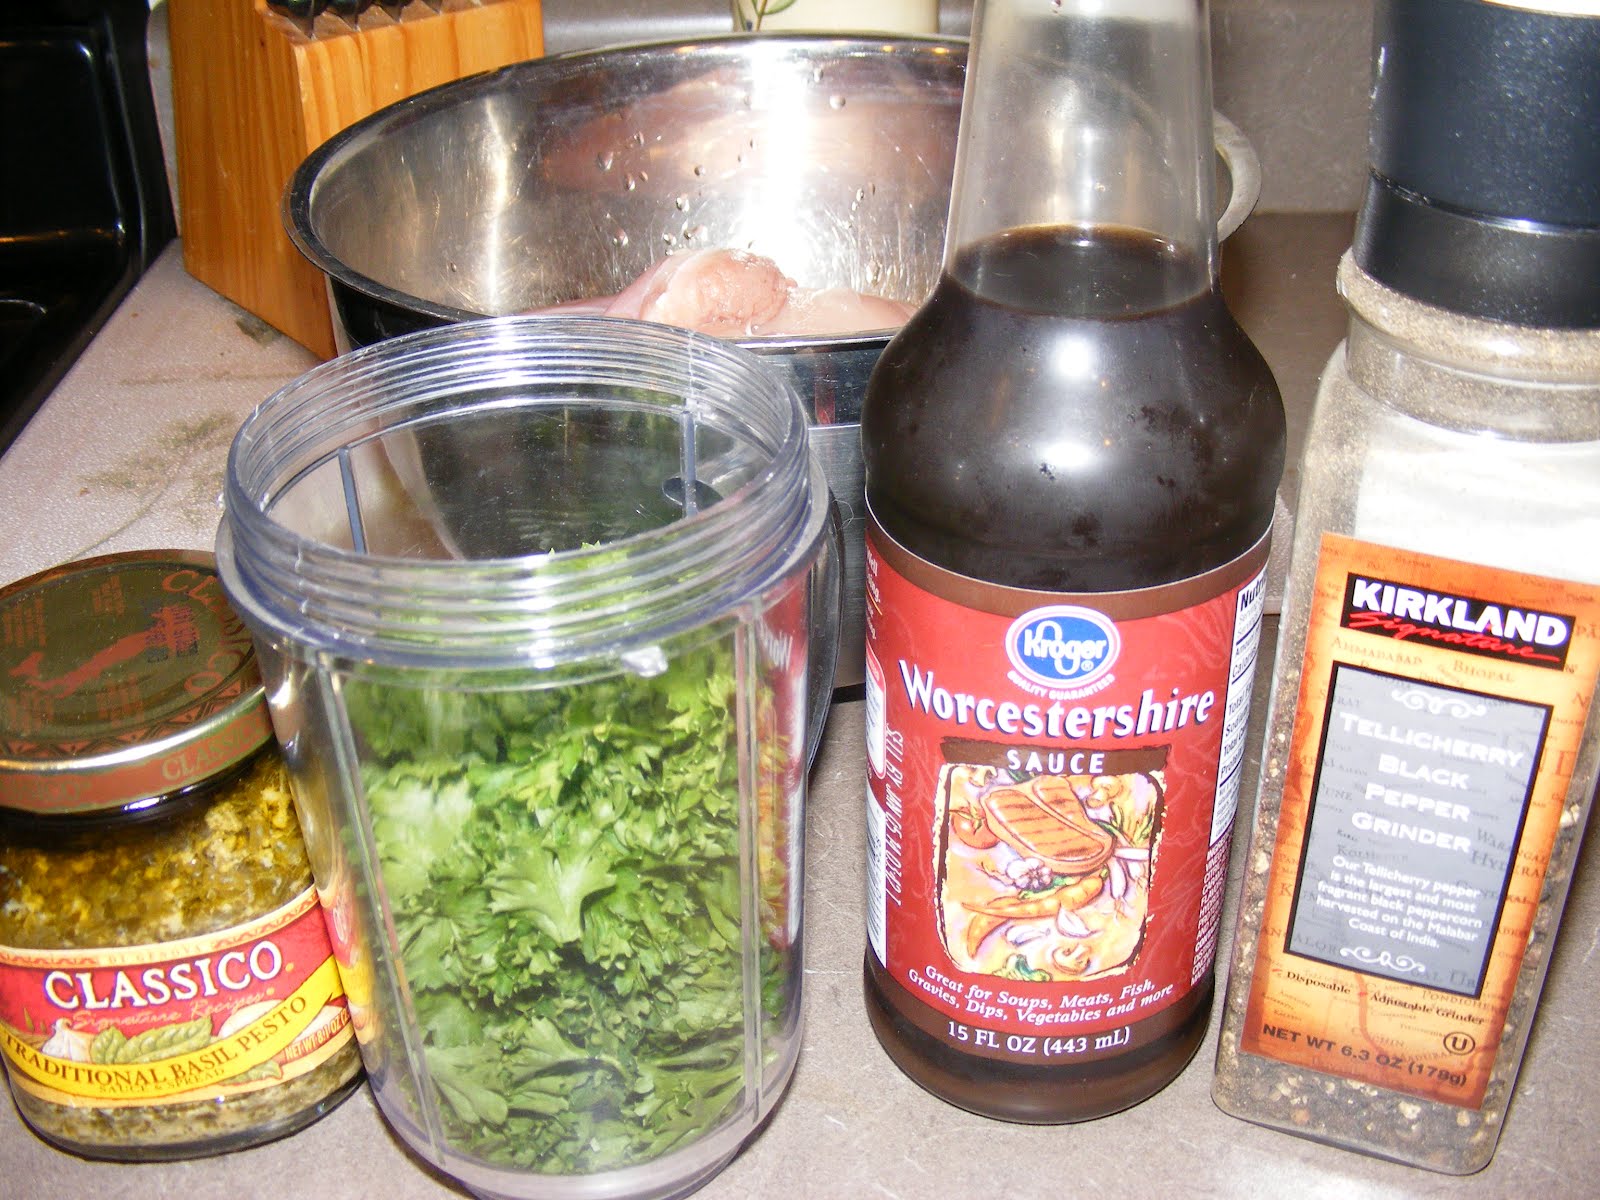
Here are the ones I used:

If you have a meat grinder or food processor I suggest grinding your own meat. You can trim off all fat and it's cheaper. If not, you can buy pre-ground chicken, just make sure it's only breast and no dark meat.

Cover a cookie sheet with foil, coat foil with a small amount of olive oil so the balls won't stick.
Add chicken, eggs/egg whites, minced onions, parsley, and bread to a large bowl. Mix thoroughly. If meatballs are too sticky to roll, add breadcrumbs, if not, roll into about 2 inch balls and place on sheet. You can put them close together, but not touching.
Bake in a preheated oven at 400 degrees for about 25 minutes or until mid temp of meatball reaches 165F. I admit, I let mine get to 175 because I'm always afraid to undercook chicken. You don't want to overcook too much or they will be dry.

Pour your sauce into a large pan or pot. I used two jars but I only added half of the meatballs. The rest went into the freezer after they cooled.
Add meatballs to sauce and heat on medium, turn down to almost low when the sauce starts to simmer. Cover but leave lid partially open to vent.
You can simmer them like this for as long as you want. The longer you simmer, the more sauce and flavor is infused into the meat.
I only left mine for about twenty minutes because we were
STARVING! :)


If your sauce seems too thin, add the 1/4 cup parmesan and continue simmering with lid partially open until it's thickened.

In the meantime, add the olive oil and pat of margarine to a pan over medium heat. Add onions, peppers, and mushrooms and saute until cooked.
Add fresh basil to your sauce. My leaves are small so I just pulled them off of the stem and added them whole. If you are lucky enough to have large leaves, you'll need to cut them up.
Cut a "V" shape into the top of your rolls to hold the meatballs. You can save even more calories if you omit the bread that you cut off.
Add some sauce and three meatballs to your sandwich. Top with one slice of cheese (cut in half), add pepper mixture and serve.
You can add additional sauce to the sandwich if you like it messy. It adds hardly any calories.
Enjoy!

Thursday, June 14, 2012

Grilled Pesto Chicken & Pasta

There was a recipe card for pesto chicken in my mail this week and it looked pretty darned good so I thought I'd try it out... with my own twist of course.
Here's what you'll need for the chicken:


Boneless skinless chicken thighs (I had 8 small-ish ones)

About a cup of fresh, de-stemmed parsley
(To tell you the truth, mine wasn't all that fresh, but it worked just fine lol)

2 Tbsp Worcestershire (I despise that word!)

2 Tbsp pesto sauce

black pepper

Run the parsley through the blender, food processor, chopper...whatever you have to finely mince it.
If you don't have any of these things then just chop chop chop until it's as finely minced as you can get it.
Add all of the ingredients except for the chicken to a ziploc bag that's big enough to hold your chicken. Mush it around, (on the outside of the bag), until everything is mixed well.
Add your chicken, one piece at a time, making sure to coat each one well with the marinade. Close the bag and allow to marinate for at least 15-30 minutes at room temp or in the fridge.
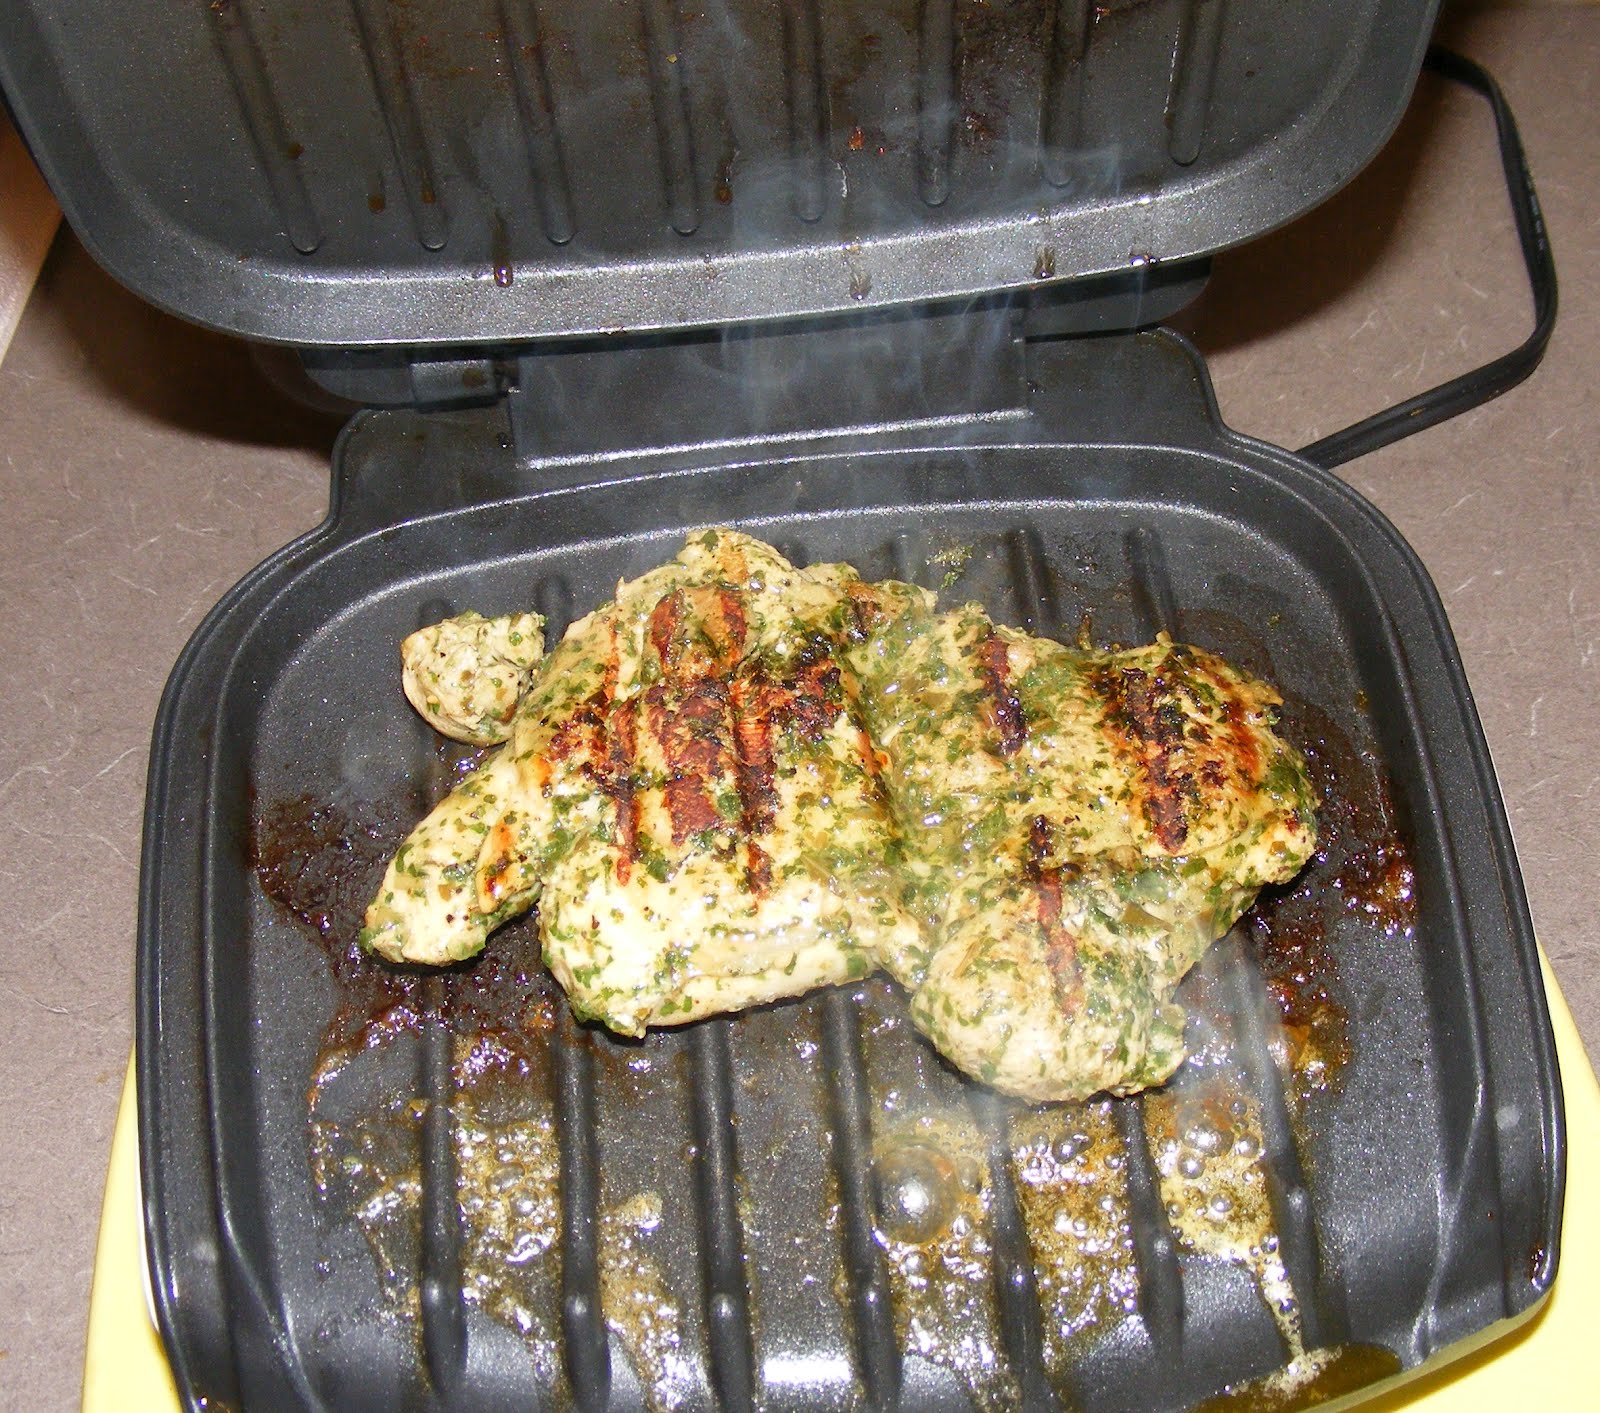
Grill for 6-7 minutes on each side to reach an internal temp of 165 but try not to go over.

You can also cook these on an indoor grill, (like my ancient Georgie. I swear it must have been the first one ever made.)

Anyway, while the chicken is marinating, start boiling the water for your pasta and begin making the pasta sauce.
What you'll need:
1/2 red & orange pepper (leftover from my last post)

1/2 small sweet onion

handful of sun dried tomatoes

the rest of the pesto sauce

a little butter or olive oil for sauteing

Saute the peppers, onion, and tomatoes
on medium until nicely browned.
Turn off the heat and stir in the rest of the jar of pesto. When your pasta and chicken are ready, mix sauce with pasta.
Serve the chicken over the top and add fresh basil if you have any.

Saturday, May 26, 2012

Garden Chicken Alfredo

You know those days when you don't have anything planned for dinner and you don't want (or have time) to go to the store?
Sometimes you have to just cook as you go. I started dinner by pulling a bunch of stuff out of my pantry and fridge that I thought would taste good together and here's what I came up with.
I also used olive oil, fresh thyme and basil.

This dish cooks up really quickly and I would say you could get it done from start to finish in less than 30 minutes for sure!
The 1st thing you want to do is to get a pot of water on the stove on high for the noodles. Keep an eye on it while you're making the sauce and when it starts to boil, cook the noodles to al dente, strain, rinse, and set aside until sauce is done.

Cut your chicken into bite sized squares. I used about a pound of tenders, (don't forget to cut that nasty little cord out as shown here.)
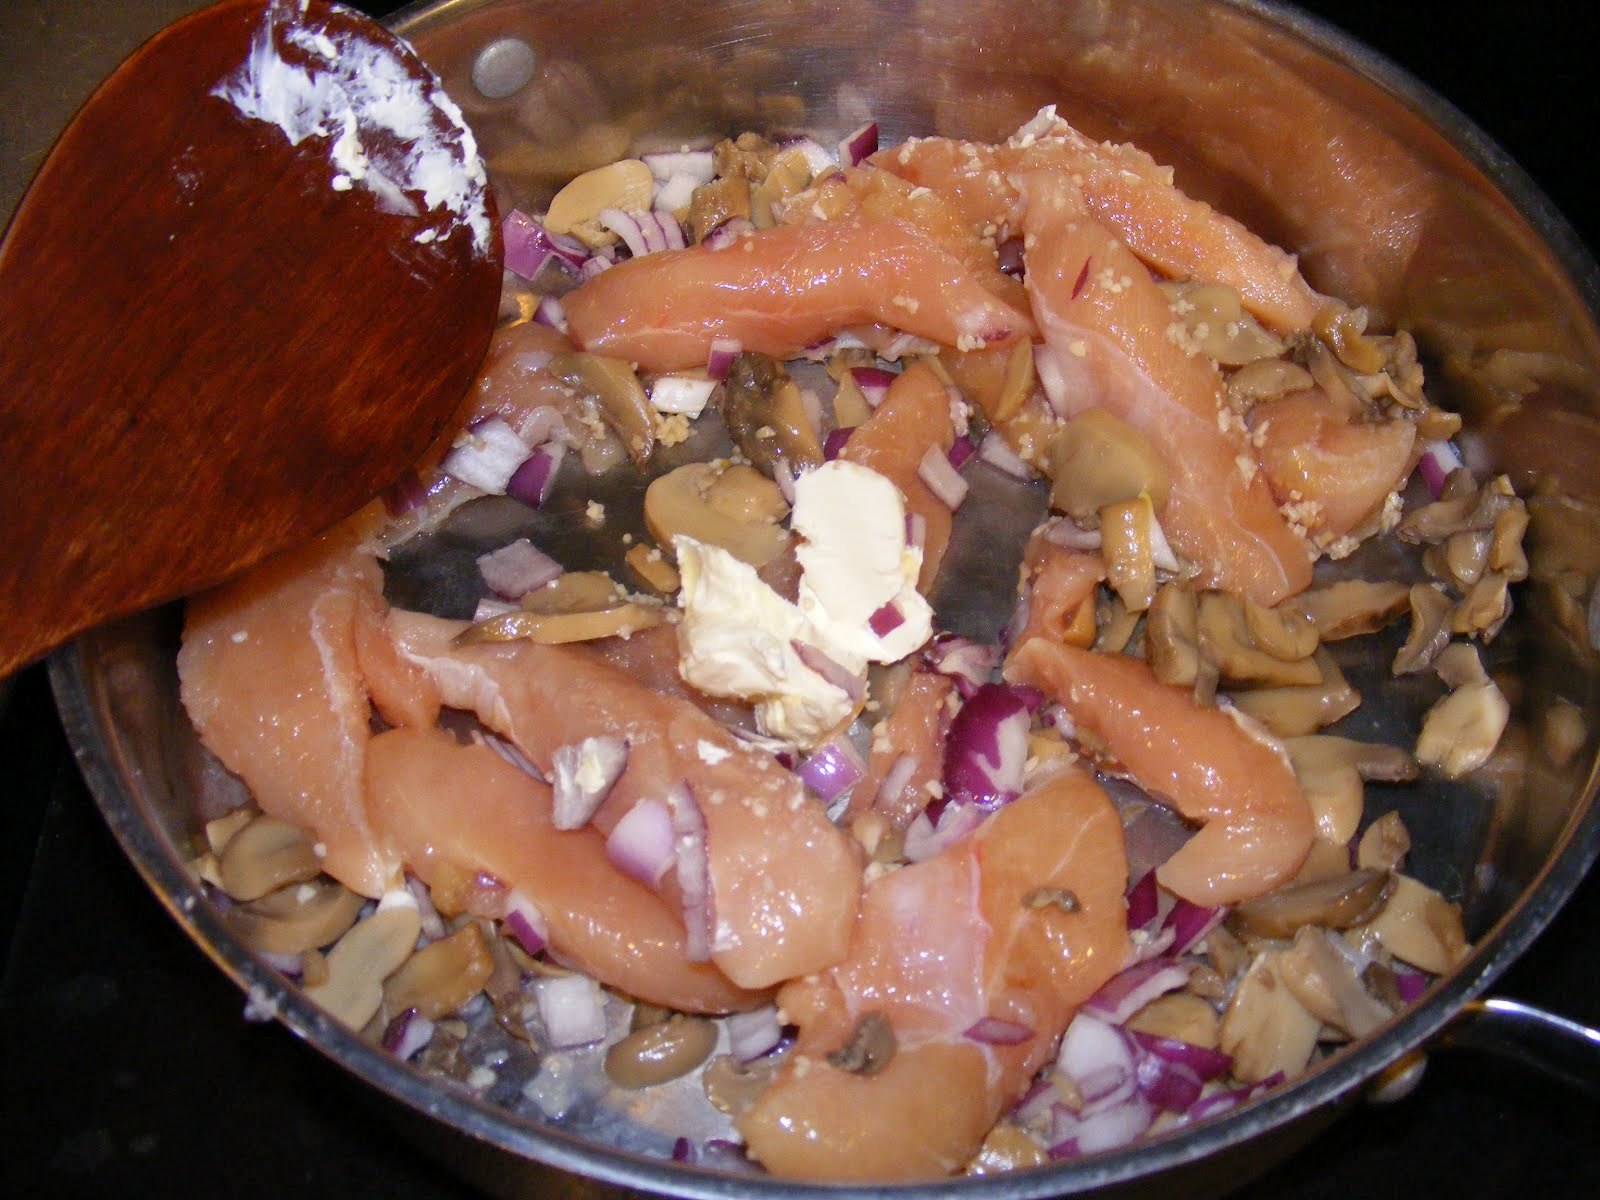
Heat about a tbsp of olive oil in a pan over med. Once hot, add 1/2 sliced onion, tbsp diced garlic, and a pkg of sliced mushrooms (always optional).
Saute for 2-3 minutes then add chicken and salt & pepper to taste. Brown chicken bringing heat up to med/high as needed. Add a small amount of sliced sun dried tomatoes like maybe 1/4 cup at the most. These can be overpowering so be careful.
Add fresh spinach to taste. I used 3 big handfuls, remember, spinach shrinks significantly while cooking.
Once spinach starts to wilt add a jar of alfredo sauce and reduce heat to low. Add three seeded, sliced roma tomatoes. Let simmer for around 2 minutes.
Stir in cooking cream and add fresh thyme, basil, and green onions to taste.
Stir in noodles and serve with garlic bread or breadsticks.
Fast, easy, and excellent for leftovers!

Thursday, May 17, 2012

Chunky Homemade Spaghetti Sauce

I received a ton of tomatoes from a co-op deal that I did a few weeks ago and I had no idea what to do with all of them. I literally got a produce box full of romas and another one full of hothouse. I decided to prep and freeze some of these tomatoes to save for making spaghetti sauce, (which I've never done in my life!). You can find the directions for prepping fresh tomatoes here Basically you just blanch the tomatoes, peel off the skins, cut in half, squeeze, and freeze. Or you can just use canned whole tomatoes. Drained, cut in half, and squeezed.
Either way you want to add your squeezed drained tomatoes to a food processor or blender. If you're using canned, probably around 2 big cans depending on how much sauce you need, or 10 to 20 fresh. Set aside about a cup or so of the tomatoes and then puree the rest of those babies up til they look like this...
Ok, set aside for now and add a thinly sliced vidalia onion, a jar of mushrooms (always optional), about a tbsp of garlic, and 1 each green and yellow bell peppers to a large pan heated with olive oil.
NOTE: Did you know that bell peppers can also be frozen for later use? Just seed, slice into rings or dice and pop in a freezer bag. So nice to have on hand.
Saute around 2-3 minutes until veggies start to soften.
Then you add a pound of ground pork and a pound of ground chicken. You can add half of each if you want to make less sauce. You can also use ground beef, ground veal, basically any ground meat but I suggest doing half and half of any two that you choose. Cook on medium until meat has browned.
Drain well and add to a large pot. Add the tomatoes you set aside earlier (diced), fresh chopped basil, about a half a small can of tomato paste, a big can of tomato sauce, (I cheated and used a jar of Ragu because I didn't have the sauce on hand lol), a few splashes of soy sauce (trust me), a couple of splashes of Worcestershire sauce, and maybe a tbsp Italian seasoning. Mix together and add two bay leaves on top. Cover and simmer on low for as long as you want. As long as you get it to a simmering boil, that is the key.
Remove bay leaves and serve over noodles for a thick and chunky homemade sauce to die for! As you can see, we serve our spaghetti over bite sized pieces of green leaf or romaine lettuce, mint leaves, and peeled cut cucumbers. It sounds strange but is a refreshing delicious twist on spaghetti. Try it, you'll be surprised!

Wednesday, May 16, 2012

Chicken and Crescent Dumplings

You know those recipes that sound too quick easy to be good? Yeah, this is one of those. My sister shared this with me a couple of years back and I'm not sure where she got it, but it is delish! It's one of those meals where everyone at my table is finishing and asking for 2nds. It's even great cold the next day! Now my husband cannot stand traditional dumplings but he love this twist on them. So here goes, try it tonight!

What you'll need:

1 whole chicken (see more below)

3 packages crescent rolls

1 small can each; cream of mushroom, cream of potato, cream of chicken

a little milk

salt & pepper

Let's start with the chicken. My sister uses a rotisserie chicken for this recipe which makes it even quicker and easier. However, when shopping for this recipe, I checked out the rotisseries and they were tiny, shriveled and $5.99! I marched my frugal behind straight back to the meat dept. to see if I could get a better deal. Luckily the whole chickens were buy 1 get 1 free and I got two whole chickens for around 5 bucks! So first I will show you how to quickly cook a whole chicken to use for shredding. (This method is courtesy of yet another sister.)

Clean and remove giblets from your chicken. Put chicken in a pot large enough for it to sit in and season however you'd like. I used some poultry seasoning and sage. It doesn't really matter too much because we'll be removing most of the skin anyway.
Put a lid on that sucker and cook on medium for about an hour to an hour and a half. My sister swears it will cook in it's own juices but I added about 2 cups of water. About 1 1/2 hours later, here's what I've got.
Ok, so remove it from the pot, let it cool, (I actually put mine in the fridge overnight because I was making it the next day.) When you're ready, remove the skin and bones and shred, as so:
Ok, so back to the fun part. Preheat oven to 350 F. Unwrap your crescent triangles, divide along perforations and roll the shredded chicken up in each on. Place in a glass baking dish. I have a larger family so I wrapped 16 crescent rolls, or the equivalent of two cans.
In a bowl, combine the soups, salt & pepper, and around a cup of milk. I may have added more milk after to make a creamier sauce. Pour the mixture over the top and around the sides of the crescent wraps. Take your last can of crescents and roll out on top of the dish. My sister likes to make it all fancy on top but I literally just unroll it and throw it on top.
Bake in the oven until top is very brown and crescents are cooked. Around 20-25 min? Could be longer. Go by the pic, lol.
And there you have it! I can't say enough about this dish! The crescents cook perfectly and the chicken wrapped inside is delicious. Serve with some veggies on the side, or you could probably even get away with adding a can of veggies to the soups before cooking. Enjoy!

Thursday, May 10, 2012

Creamy Chicken and Broccoli

You know those days where you have to cook something but don't have any meals planned out and don't want to go to the store? This was one of those days. Sometimes my best creations come from "pantry diving". It's fun, almost like playing "Chopped" lol. Here's what I had:

about a pound of chicken tenders
red onion
big can of mushrooms
about a tbsp garlic (diced)
head of broccoli, chopped
1 small can each cream of mushroom, cream of potato
some butter (I was even out of olive oil)
fried onions

First thing is to defrost your chicken and remove that white little tube thing at the top of each piece. I don't know what it's called but if you leave it on it will be chewy and gross. Remove like so: (Keep in mind, we're only cutting the white part off, we're not cutting off the whole top part although that's what it looks like in the pic)
Heat a pat of butter or about a tbsp of olive oil to a large pan over med . Add chicken, garlic, onions, & mushrooms and saute until chicken is nearly cooked. You could also cut each tender into about three pieces prior to cooking to shorten cooking time.
Add broccoli and a little more oil if needed and heat until chicken is cooked and broccoli is crisp-tender.
Add both cans of soup. You can also stir in about 1/2 cup of fried onions. (thought of this just now, wish I would have done it) Reduce heat to med-low. Cook just until heated through.
Add fried onions to the top. You can either serve here or cover for about a minute to let the onions heat up a bit.
Serve over rice or mashed potatoes. An excellent comfort food!

Wednesday, May 2, 2012

Perfect Roasted Barbecued Chicken Thighs

Believe it or not, the best way to cook barbecued chicken is in the oven! (or roaster) If you have a roaster, this is a fool-proof recipe for perfect BBQ chicken thighs every time. If you don't have a roaster, you can cook this in the oven covered in tin foil. I highly suggest a roaster to anyone who cooks often or for a lot of people. They're relatively inexpensive, use less electricity than the oven, and won't heat up your house in the summer. Here's mine:
It's a Hamilton Beach 18 QT which is just big enough to hold my 11x15 pan. Nothing to look at but it gets the job done. It gets the job done better than the oven sometimes.
On to the recipe...
There's not much you need in terms of ingredients, the most important part of getting these just right is method. Let's talk first about how to trim the thighs themselves. I have a large family so I buy the big family pack of thighs with the skin on. As you can see here, they come with an excess of skin. If you leave all of this on, it will just turn out mushy or gooey.
First, turn your thigh upside down, then grab that extra flap of skin, pull up and trim. Like so:
Keep in mind that I left the skin on the front of the thigh, we're only trimming the excess that folds over to the back. You have one other bit of fat that you need to trim off your thighs. (haha Don't we all?)Anyway, it's not skin and it's attached to the meat itself. See here:
There we go. Now we're all nice and trim. Rinse the chicken under cold water, shake off excess water and add to your pan.
Here I used an 11x15 glass baking dish so I had plenty of room. It's perfectly ok to really compact them in there as long it's single layer. As you will see in later pics, they shrink quite a bit after cooking. After adding to the pan, drain any excess water that may have accumulated and add your spice. I used McCormick Grill Mate in Mesquite because I got a bunch of them for free with a coupon. In the past I've also used the Montreal Steak seasoning from Grill Mate or Famous Dave's seasoning. Really you can use any BBQ type seasoning that sounds good.
Once seasoned, pop the pan into a preheated (350 degree) roaster for about 1 1/2 hrs. Or cover with a tin foil tent and put in preheated oven on the middle rack. After an hour and a half or so you will have this:
If you'd like, you can stop here and call them roasted chicken thighs. They are delicious! If you're still set on BBQ, you need to drain about 90% of the juices from the bottom of the pan. Pour BBQ sauce over the tops of the thighs. I don't flip them over, just brush the tops and allow some of the excess to drip down to the bottom of the pan. I used Sweet Baby Rays sauce. For this size, just over half of a bottle was necessary. You don't want too much sauce, you can add more later or serve it on the side. Put pan back in the roaster for 20-30 minutes. I'm not sure why this next picture looks so red. It was not red at all but more like the color of the top pic.
Check for doneness, plate your thighs and you're done. Perfect!