Monday, May 14, 2012

Salisbury Steak with Mushroom Gravy

My husband loves ground beef! I'm not too keen on it and I wanted to try something other than the traditional meatloaf or burgers so I decided on Salisbury steak with a sort of wine/mushroom gravy. Makes 5 or 6 serving.
Let's get right to it!

Here's what you'll need:

1-1 1/2 lb ground sirloin

1/2 or so grated onion (sweet or white)

bout 1/4 of an onion (sweet or white) slivered or sliced thinly

2 garlic cloves, minced

olive oil

1-2 tbsp butter

mushrooms (we used baby bellas but any will work, canned or fresh)

red cooking wine

1 1/2-2 C beef stock or broth

flour or cornstarch

red wine vinegar

salt and pepper to taste

First mix the raw meat with the grated onion, salt, pepper, and garlic. Once mixed thoroughly, (I suggest mixing with your hand), shape into 5-6 patties. Looking back, I would have made my patties just a little thinner. Learn from my mistake. :)
Heat a pan over med-high or you can do what I did and use a griddle at about 350. Coat either one with olive oil and cook patties 2-3 min on each side until browned but not burnt. I should have cooked mine a little less, again, learn from my mistakes. haha
For gravy, melt the butter in a pan and add your mushrooms and onions to saute about 3-4 minutes. Add around 1/2 cup or so cooking wine and continue cooking, stirring some. Separately, combine the broth with either about 2 tbsp flour or 1 tbsp corn starch. Once whisked smooth, add to the pan and bring to a slow boil stirring consistently during this time.
Once thickened to your liking, add the patties and around 2 tsp red wine vinegar to the pan and heat for another 1-2 minutes. Serve with a side of mashed potatoes or rice.

Thursday, May 10, 2012

Creamy Chicken and Broccoli

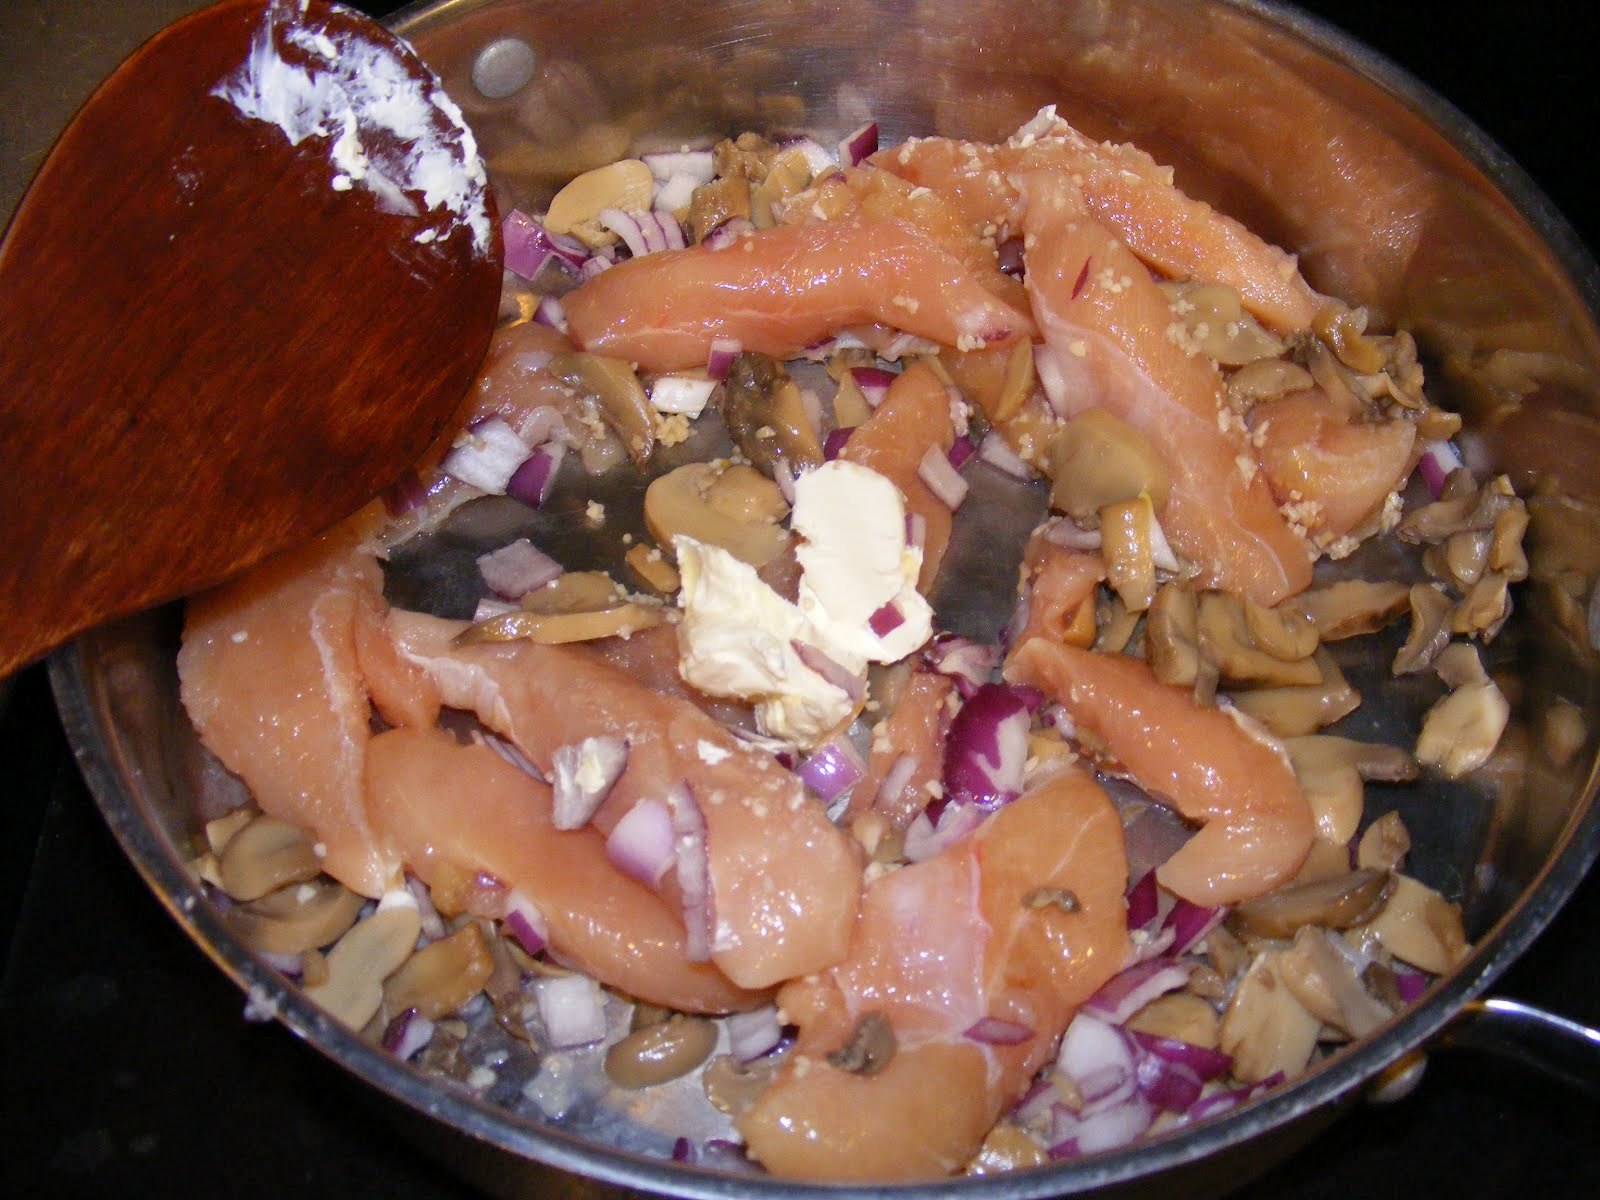
You know those days where you have to cook something but don't have any meals planned out and don't want to go to the store? This was one of those days. Sometimes my best creations come from "pantry diving". It's fun, almost like playing "Chopped" lol. Here's what I had:

about a pound of chicken tenders
red onion
big can of mushrooms
about a tbsp garlic (diced)
head of broccoli, chopped
1 small can each cream of mushroom, cream of potato
some butter (I was even out of olive oil)
fried onions

First thing is to defrost your chicken and remove that white little tube thing at the top of each piece. I don't know what it's called but if you leave it on it will be chewy and gross. Remove like so: (Keep in mind, we're only cutting the white part off, we're not cutting off the whole top part although that's what it looks like in the pic)
Heat a pat of butter or about a tbsp of olive oil to a large pan over med . Add chicken, garlic, onions, & mushrooms and saute until chicken is nearly cooked. You could also cut each tender into about three pieces prior to cooking to shorten cooking time.
Add broccoli and a little more oil if needed and heat until chicken is cooked and broccoli is crisp-tender.
Add both cans of soup. You can also stir in about 1/2 cup of fried onions. (thought of this just now, wish I would have done it) Reduce heat to med-low. Cook just until heated through.
Add fried onions to the top. You can either serve here or cover for about a minute to let the onions heat up a bit.
Serve over rice or mashed potatoes. An excellent comfort food!

Tuesday, May 8, 2012

Perfect Pork Marinade

I received a new campaign for pork from bzzagent* and although I haven't actually received the coupon yet, it inspired me to share this marinade.


We LOVE pork in our family! My husband is half Vietnamese and he grew up on pork and rice. To me, pork is so versatile and, for the most part, very inexpensive. Here is an awesome marinade using some traditional Vietnamese flavors that makes the most tender, moist, and delicious pork.

I used pork steak this particular time but you can use several different cuts and it doesn't matter whether or not it has a bone.

The Marinade:

about 1/2 c to 1 c fish sauce depending on how much pork you're cooking. I used about a cup. Please don't be afraid of the name. Fish sauce is salty and flavorful but it doesn't make your food "fishy". Try it.
about 2 tbsp diced garlic
about 1/2 cup lemon juice (I use bottled)
about a tbsp of olive oil
Mix everything together in a large bowl then add enough water so that the marinade will cover your meat. (as shown)I also added some chopped cilantro that I had left in the fridge and a splash of Ponzu but these are totally optional. Add your meat. Please don't add any salt because the fish sauce will take care of that.
You can marinate the pork anywhere from 1 to 4 hours or longer. Personally, I leave the marinating meat on the counter for about an hour, but it's up to you whether you are comfortable with this method or not. I've found that pork and beef grill better when closer to room temp. If not, cover with saran wrap and throw it in the fridge.

Now you're ready to start grilling. Heat your grill up to about 300 degrees on medium with the lid closed. Add your pork and close the lid.
One trick to grilling that a lot of people don't get is that you should really try not to flip your meat more than once. Now that we've added the meat, we want to keep an eye on the temperature. Once it's right under 400, open the lid and let them continue cooking. This is a bit of a process and it's something that you just learn but basically this method involves closing the lid to heat it up then opening to cool it down and so on and so on. Don't let it get past 400. Once the meat is starting to turn white on top and brown on bottom, it's time to flip. Continue grilling until bottom and top are cooked equally. Remember, pork doesn't have to be cooked to as high of a temp as say poultry. 145 degrees is the average recommendation with a 3 minute rest, and according to The National Pork Board, it's best that the juices run a bit pink. Overcooked pork is a big reason why a lot of people won't grill it. To be honest, I actually overcooked it a bit myself in this next pic.
Serve with some Jasmine rice and glazed carrots for a delicious meal.

Thursday, May 3, 2012

Veggie Sandwich With A Twist

Sometimes even a SAHM gets too busy to cook. Events happen that are out of our control and we end up looking at each other at 6pm going "Uh, what's for dinner?". Last night was a night like that. We had to go help a family member and luckily she got these when we were done:
Yep. A Little Caesars $5 Hot N Ready pepperoni pizza. So I decided to do a mini blog about delicious sandwiches. I made one the other afternoon that I thought I'd share.
This is a cheese and veggie sandwich,(only because we didn't have any lunchmeat), and it was great! Have you ever put cilantro on your sandwiches? I had never heard of it until I was introduced to Vietnamese sandwiches a few years ago. The traditional sandwich has BBQ pork, cucumber slices, shredded carrots and daikon, raw jalapenos, and cilantro served on a baguette type bread (Bánh mì) with a side of nước mắm (fish sauce). Anyway, my sandwich has white american cheese, roma slices, red onion, green leaf lettuce, avocado, and cilantro. Added a tiny bit of light mayo and some salt and pepper. Excellente!
Bánh mì:

Wednesday, May 2, 2012

Perfect Roasted Barbecued Chicken Thighs

Believe it or not, the best way to cook barbecued chicken is in the oven! (or roaster) If you have a roaster, this is a fool-proof recipe for perfect BBQ chicken thighs every time. If you don't have a roaster, you can cook this in the oven covered in tin foil. I highly suggest a roaster to anyone who cooks often or for a lot of people. They're relatively inexpensive, use less electricity than the oven, and won't heat up your house in the summer. Here's mine:
It's a Hamilton Beach 18 QT which is just big enough to hold my 11x15 pan. Nothing to look at but it gets the job done. It gets the job done better than the oven sometimes.
On to the recipe...
There's not much you need in terms of ingredients, the most important part of getting these just right is method. Let's talk first about how to trim the thighs themselves. I have a large family so I buy the big family pack of thighs with the skin on. As you can see here, they come with an excess of skin. If you leave all of this on, it will just turn out mushy or gooey.
First, turn your thigh upside down, then grab that extra flap of skin, pull up and trim. Like so:
Keep in mind that I left the skin on the front of the thigh, we're only trimming the excess that folds over to the back. You have one other bit of fat that you need to trim off your thighs. (haha Don't we all?)Anyway, it's not skin and it's attached to the meat itself. See here:
There we go. Now we're all nice and trim. Rinse the chicken under cold water, shake off excess water and add to your pan.
Here I used an 11x15 glass baking dish so I had plenty of room. It's perfectly ok to really compact them in there as long it's single layer. As you will see in later pics, they shrink quite a bit after cooking. After adding to the pan, drain any excess water that may have accumulated and add your spice. I used McCormick Grill Mate in Mesquite because I got a bunch of them for free with a coupon. In the past I've also used the Montreal Steak seasoning from Grill Mate or Famous Dave's seasoning. Really you can use any BBQ type seasoning that sounds good.
Once seasoned, pop the pan into a preheated (350 degree) roaster for about 1 1/2 hrs. Or cover with a tin foil tent and put in preheated oven on the middle rack. After an hour and a half or so you will have this:
If you'd like, you can stop here and call them roasted chicken thighs. They are delicious! If you're still set on BBQ, you need to drain about 90% of the juices from the bottom of the pan. Pour BBQ sauce over the tops of the thighs. I don't flip them over, just brush the tops and allow some of the excess to drip down to the bottom of the pan. I used Sweet Baby Rays sauce. For this size, just over half of a bottle was necessary. You don't want too much sauce, you can add more later or serve it on the side. Put pan back in the roaster for 20-30 minutes. I'm not sure why this next picture looks so red. It was not red at all but more like the color of the top pic.
Check for doneness, plate your thighs and you're done. Perfect!

Tuesday, May 1, 2012

Citrus Grilled Tilapia Packets

When I was a young mother I thought the only way to cook fish was directly on the grill and the only fish I (thought) I knew how to cook was catfish. Needless to say, I hated to cook fish because it never really turned out right and half of it ended up in the bottom of the grill.
Today we're talking about Tilapia packets but making foil packets in general is a really great way to use the grill. You can be creative on what you add and it will always turn out perfectly! I love the way everything steams together and takes on each other's flavors. Easier cleanup is another bonus.
On a side note: if you make this recipe I would suggest adding some red or yellow pepper rings to the packets. I wish I would have. Ok, on to the recipe...

Ingredients (per packet)
1-2 filets of tilapia depending on their size. I used frozen and they were tiny
1-2 orange slices
2 lime slices
some shallots or red onion thin sliced
bit of diced garlic
fresh thyme sprig
2-4 tbsp white wine
salt & pepper
about a tbsp butter or margarine

Start by making a foil "bowl" to hold everything. I formed mine to the inside of my glass baking dish to keep anything from spilling out. Put down the orange, lime, shallot, butter, garlic. (as shown)Remember, this is not an exact science, you can put more or less of anything or omit things, change stuff around, whatever you want!
Add the fish on top, sprinkle with salt & pepper, add thyme (you could easily substitute dill here). This is where I would have added a slice or two of bell pepper..add wine. If you don't like wine, add a little water or more butter. The point is that you need the liquid to steam the fish. I would NOT suggest adding beer. We made a couple of these with beer and it made the fish way too bitter.
Now it's time to fold up the packets. First bring the two long sides of the foil together and fold a few times, then fold the ends up towards the fish. Keep the packets seam side up and poke two small holes in the foil so that steam can escape. Put these on the grill for around 12-15 minutes keeping the grill right around 350-400 degrees. I also alternated opening and closing the grill depending on if the corn was getting too hot.
P.S. If you're going to grill corn in the husk, make sure you soak it in water first or it will catch fire.
You'll be able to hear the liquid boiling inside of the packets.
The fish is done when it is white and opaque. Enjoy.

Monday, April 30, 2012

Herb-Crusted Pot Roast

I thought I'd start with something simple that everyone is familiar with. It's a great way to cook those cheap chuck roasts that always looks so good in the store, and always turn out dry and flavorless.
Ingredients for the roast:
2-3lbs chuck roast
1/2 cup bread crumbs (panko would also work here)
3-4 tbsp olive oil
2 tsp ground mustard
1 tsp crushed rosemary
I also sprinkled in some sage, salt, and poultry seasoning.
Mix everything together and rub the roast with it. Be sure to get a nice coating on it.
Bake on a rack uncovered in the oven or just throw it in the roaster like I did. I would say 325 degrees for about an hour and a half to two hours.
145 degrees for med rare, 160 medium, 170 for beef jerky, haha aka well done.

As you can see I cooked mine over some fingerling potatoes, parsnips, onions, and carrots. The drippings from the meat give them a great flavor. Don't forget to add water to the bottom of your pan or your veggies will burn.